

In our increasingly digital world, screenshots serve as critical tools for communication, instruction, and information sharing. The capability to edit these screenshots, specifically, to draw and write on them, further amplifies their utility. In presentations, bug reports, guides, or even casual conversations, annotated screenshots can convey context, provide clear instructions, and communicate complex ideas quickly and efficiently.
Screenshots have a rich history, evolving from primitive screen-capturing functionality in early computer systems to today’s sophisticated editing tools. Early in computer history, users could only take rudimentary screenshots, often lacking the means to edit or annotate them directly.
Basics of Taking and Editing Screenshots
Before delving into the specifics of editing screenshots, it’s crucial to understand the basics. Screenshots, in essence, are a capture of your computer, tablet, or smartphone screen at a given moment. Whether it’s an error message, a fascinating infographic, or an engaging social media post, screenshots are a way to record and share these instances.
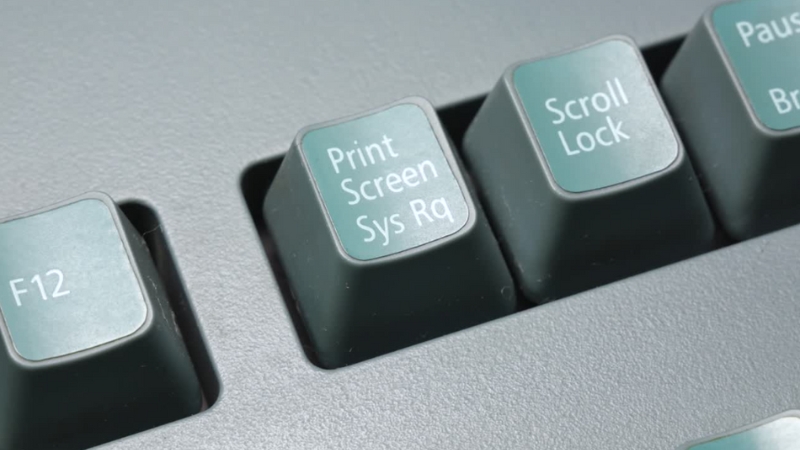
Taking screenshots varies depending on the device. On Windows, the ‘PrtScn’ key captures the screen, whereas on a Mac, the ‘Command + Shift + 3’ command serves the same purpose. Mobile devices, too, have built-in screenshot capabilities, usually involving pressing a combination of buttons. Once the screenshot is captured, you can typically access it in a dedicated folder on your device.
But what about editing these screenshots? Today, several online tools can help. These platforms not only offer basic editing features, such as cropping and resizing but also provide extensive options for annotation. Drawing shapes, adding text, highlighting areas – these tools empower you to communicate your ideas clearly and concisely through screenshots.
If you’re looking to enhance your online screenshot-capturing and conveying experience, be sure to check out these ten exceptional Chrome extensions designed specifically for taking screenshots.
A Step-By-Step Guide to Editing Screenshots
Editing screenshots may seem challenging at first, but understanding the process can simplify it. Here are the steps:
- Identify your needs: First, you need to understand why you’re editing the screenshot. The purpose can vary widely, from drawing attention to a particular section, commenting on a design mockup, or creating a step-by-step user guide. For example, if you’re making a user guide, you might want to highlight specific buttons or fields that the user needs to interact with.
- Take the screenshot: After identifying your needs, the next step is capturing the screenshot using the method appropriate for your device.
- Upload and edit: Then, upload your screenshot to your preferred online editing tool. Once uploaded, you’ll have a plethora of tools to use. For instance, you can draw shapes or lines to highlight areas, add text for commentary or instructions, or adjust colors and sizes for emphasis.
Exploring the Best Online Tools for Editing Screenshots

There is an abundance of online tools available for screenshot editing, each boasting unique features and strengths. Let’s explore a couple of them:
- Skitch by Evernote: Known for its user-friendly interface and comprehensive annotation tools, Skitch is an excellent choice for both novices and experienced users. It allows you to easily highlight areas, add text, and even blur parts of the screenshot for privacy.
- Markup Hero: This tool stands out for its advanced features, such as link sharing, making it ideal for collaborative work. For instance, if you’re working on a design project with a team, you can annotate a screenshot and share it with your colleagues through a link, enabling real-time feedback.
Each of these tools has a unique set of features to explore. Some may offer extensive editing capabilities, while others focus on simplicity and ease of use. Regardless of your needs, there’s likely a tool out there that fits the bill.
However, it’s essential to spend some time researching and testing out different platforms to find the one that meets your specific needs and preferences best. For example, if your work involves a lot of collaboration, you might prefer a tool with robust sharing features. Alternatively, if you’re new to screenshot editing, a platform with an intuitive interface could be more suitable.
Advanced Techniques in Screenshot Editing
Beyond the basics, there’s a world of advanced techniques to explore in screenshot editing. As you become more comfortable with the fundamental tools, you can begin to experiment with more advanced functions to further enhance your screenshots. These techniques can add a professional touch to your images, helping you communicate more effectively.
One of these techniques is the use of layers and blending modes. These can help you add text and shapes that interact with the screenshot in interesting ways, emphasizing specific elements without obstructing important information. Another advanced technique is the use of filters and effects, such as drop shadows, gradients, and blurs, which can add depth and focus to your annotations.
Let’s look at some case studies of effective screenshot editing. Web designers often use screenshots with extensive annotations to present mockups to clients or team members, using arrows, highlights, and text to guide viewers through the design. In user guides or technical manuals, annotated screenshots can clearly illustrate complex procedures, providing step-by-step visual instructions that greatly enhance comprehension.
Maximizing the Potential of Screenshots in Communication

Screenshots play a vital role in modern communication. In a world where visual content dominates, screenshots offer a quick, effective way to capture and share information. However, to truly maximize their potential, it’s crucial to master the art of screenshot editing.
There are several techniques for effectively drawing and writing on screenshots. First, always aim for clarity. Ensure your annotations clearly highlight or explain the necessary elements without confusing the viewer. Second, keep it simple.
Avoid over-annotating, as too many shapes or text can distract from the screenshot’s content. Lastly, remember that color can be a powerful tool. Use contrasting colors to make your annotations stand out, but be wary of clashing or distracting color combinations.
The Role of Screenshots in Digital Learning

The advent of digital learning has revolutionized education, bringing about a shift from traditional classroom settings to online platforms. In this digital landscape, where remote learning and e-learning modules have become the norm, the need for effective visual aids has never been more crucial. Among these aids, screenshots have emerged as powerful tools for enhancing learning experiences.
Screenshots capture a specific moment on a computer, tablet, or smartphone screen, allowing educators to capture and convey information in a concise and visual manner. Whether it’s a snippet of code, a diagram, or a website interface, screenshots serve as valuable visual references that supplement textual explanations and engage learners with visual content.
When it comes to incorporating annotations into screenshots for educational purposes, online tools provide a convenient and efficient solution. These tools enable educators to draw, write, and highlight important elements directly on the screenshot itself. By adding annotations, educators can emphasize key concepts, guide learners’ attention, and provide context, ultimately enhancing comprehension and retention.
Final Words

In conclusion, the ability to edit screenshots by drawing and writing on them has become increasingly important in our digital world. Screenshots serve as valuable tools for communication, instruction, and information sharing. Online tools have made the process of editing screenshots more accessible, allowing users to highlight areas, add text, and enhance visual communication.